Home, Crafts, Photography, Painting, Writing, FREEBIES

Wednesday, August 15, 2018

The Essence of Creativity

The Essence of Creativity

A saw this quote the other day on Instagram, and I knew I had to share it on this blog, Carpe Diem! Seize the Day to Create!  This quote envelopes the essence of creativity.   Posted by fullcirclebtq.instagram

THOUGHTS BECOME THINGS.
IF YOU SEE IT IN YOUR MIND,
YOU WILL HOLD IT IN YOUR HAND.
John Procto the Law of Attraction.com

Nothing more to say, THAT IS creativity.

Monday, June 18, 2018

MY FIRST SALE ON ETSY.COM

I MADE MY FIRST SALE ON ETSY.COM


Truly, I am higher than a kite.  On June, 16, 2018, I made my first sale on Etsy.com in my shoppe, GoodThingsSmallBoxes

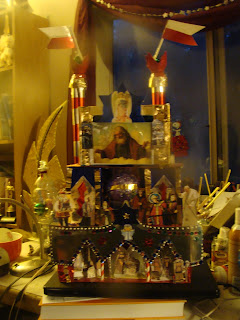
I check my Etsy.com Shoppe every day, just in case there is an interested buyer.  I was shocked, thought I was dreaming when I opened it the other day to find that someone had bought my handmade Polish Szopka!! A szopka is a Polish traditional nativity scene. It is large and elaborate, made of paper, glue and tape.  For further discussion, please see my previous blog.  

Traditional Polish Szopka by Arlene Klatkiewicz-Pitts
My first sale on Etsy.com

I cannot tell you the deep thrill and excitement of someone, a stranger finding one's work, and liking it so much that they purchase it!  For fear of sounding like Sally Field, ("they like me they really like me"), wow. I made it. I wanted to sell it. I wanted it to happen. It did and now I'm surprised that someone else appreciates and likes my work, or what they could see. 

Even if it is only one sale, but I doubt it, this confirms and reaffirms the truth to "BELIEVE IN ONESELF".

What is more, I am so joyful to be sharing my Polish culture with others and keeping the love of this tradition alive even in a small way.

One sale....I know, but it fuels my enthusiasm. It blasts those who laughed and said it couldn't be done.  It lifts my spirits high.  It confirms where believing in oneself can go.  Thank you. Thank you. Thank you.  I pray that many more find my shoppe and enjoy my creations.

(I will not reveal my buyer in order to keep their confidentiality secure.)
~~Marie
#etsy.com
#szopka
#polishculture

Monday, June 4, 2018

What Else has Carpe Diem'ed my Days

Other creative pursuits during the month of May, 2018.
HAPPY SPRING DECORATION
 S
Hoppy Easter signs


My 2nd Szopka dedicated to
the Black Virgin of Poland


An Advent Calendar made of
Pill Containers

The Christmas Advent Calendar needs another coat of gold metallic acryllic paint.  Be sure to sand the lids very well before painting. This will help you avoid multiple coats of paint.


A set of Shabby Chic Apothecary Jars made
from Folder's Coffee containers and Dollar Tree Items

The Flowers on the Lid were a special purchase on Amazon

TRIP TO TAHOE!!

On yet another trip to Tahoe, I was able to use my 'creative' photography skills to capture what remains of the snow in the California Sierra's.


Caples Lake

A Meadow with a Stream near Kirkwood, CA


I have been busy with my creative endeavors! If you want to know how I created any my crafts/arts, feel free to ask. If I get requests, I will put them on YouTube.

Thanks for visiting! ~ Marie

May: NATIONAL SCRAPBOOKING MONTH

I keep forgetting that May is National Scrapbooking Month, but this year, I happened to catch the announcment in my email from Scrapbook.com telling of their yearly contests in celebration of all memory keepers who scrapbook.  I first joined in in 2008 when there was a set day, time and site. You had to reserve that day, be there to receive instructions and submit your creations by a deadline time.  It was maddening!  One would try to create something amazing in a short few hours, take pictures and upload them to the site.

I like the way they are doing it now.  They announce the contests in April and give you a deadline approximately a month later for submissions.  Even the submission process has gotten easier. You can enter as many times as you desire.  A much more practical way to do it.  I liked the thrill of trying to get it done with a deadline  with what I had on hand on that day.  However, it felt more like a race, than a creative contest.  I love having the time to incubate ideas, gather supplies, create. 

The prizes are amazing. There are gift cards from major scrapbooking supply stores, craft stores, etc. I entered several things this years.

I did not win anything this year. I had in 2008. I won all sorts of embellishments that were outstanding.   Although I did not win a prize this year, I did get something more than I expected. I took the time to look at many of the other entries. The creativity out here is so wonderful. So many ideas are shared.  You know what happens when creative ideas are shared??  More creative ideas are born!!! New methods are learned and people grow. I know I have grown just from looking at the other entries, other member's galleries of their creations, commenting on their entries. What is more, I made a few friends doing so.  Creative, crafty people are so friendly, fun, exciting.  Creative people fuel the imaginations of other creative people.   For me, I won grand prize, the friends, ideas, methods and sharing of so many creative people.  

A special thanks to Scrapbook.com for sponsoring this amazing event each year. It gets better all time!  Thank you to the vendors who donated the prizes. They are greatly appreciated. Thanks, too, to my fellow creative scrappers.  Thank you for your comments, encouragement, and love, but most of all thank you for helping my creative side grow.  #scrapbook.com #nationalscrapbookingmonth

Below are a few of my entries. There were three categories:

To enter the Live, Laugh, Layout Challenge: you create a layout that incorporates a wide variety of embellishments.  To enter the Die Cut Challenge you To enter a creation that shows off your creative use of die cuts.  The Crafters Choice Challenge allowed crafters to enter whatever they create, not just scrapbook pieces.

My Live, Laugh Layout Challenge submittal:  A three page scrapbook layout of my birthday at the Grand Canyon with map post card pocket and a self authored Haiku.

page one

post card pocket

page 2

page three

GRAND CANYON HAIKU


My submission for the Die Cut challenge was a wall hanging made with machine, handcut and purchased die cuts;

A Diecutville Christmas


My other entry, Crafters Choice, were the fairy home domes that I detailed in my previous blog.

Fairy Home Dome

These Fairy Home Domes are for sale in my
Etsy Shoppe: GOOD THINGS SMALL PACKAGES  There are four different positions right now. I am in the process of making the "home domes" for gnomes, elves, dragons, etc.  I also take custom orders.

~Marie
       #scrapbook.com, #nationalscrapbookingmonth
SCRAPBOOK.COM  (not just scrapbook supply site, a community of very creative people!)


NEW ITEMS FOR "GOOD THINGS SMALL BOXES" ETSY SHOPPE

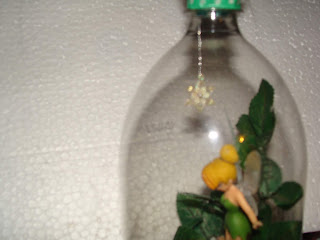
I have added several new items to my Etsy Shoppe, Good Things Small Boxes!  With the current "Fairy Garden" craze, I decided that my fairies, elves, gnomes, cute animals, etc. needed a safe home, free from tiny admiring hands and beloved, curious pets!  After all the hard work put into the gardens, scenes, vignettes, as tempting as it is even for me, lol, I wanted to protect my beloved creatures, and find a safe way to ship them so others who admire them, could have them.

I have started with Fairies!  Right now there are limited numbers of each. In fact, I am looking to find these lovely fairies again as they are have been hard to find.  I put them into garden scenes inside of clean recycled two liter bottles. They are sold by position. For example:


              SITTING

         
              LAYING ON THE FOREST FLOOR


                   SITTING AND LAUGHING

            STANDING ADMIRING HER PHYSIQUE

PLEASE CHECK OUT MY ETSY SHOPPE, GOOD THINGS SMALL PACKAGES. I will be adding more "Dome Homes" for elves, animals, dragons, etc.   I ALSO TAKE CUSTOM ORDERS!  Just leave a note in the comments or write me on my email: carpediem5790@yahoo.com!

HELP SPRINKLE THE MAGIC FAIRY DUST!!

Sunday, April 22, 2018

GoodThingsSmallBoxes Etsy Shoppe Grand Opening!

YAY YAY MY ETSY SHOPPE IS OPEN!


GRAND OPENING GO GO GO 

I can't believe it but it is happening!  In 2011, it was great idea.  In 2012 it became a desire. From 2012 to 2017 it became a goal. 2017  it was something I had procrastinated on. 2018 its time had more than come!  Step by step, and finally there it is, a place to share and sell my crafting ideas and creativity.  

Go check my items and let me know what you think. Are my prices too high, too low?  Improvements, kudos, constructive criticism welcome.


Dragon Pins Various colors

Glitter Christmas Ornament

Gift or Keepsake Box

I Love Coffee Java Pin

Polish Szopka

Vintage STYLE Christmas Ornaments

Vintage STYLE Christmas Ornaments

MORE MORE MORE AND MORE TO COME!

GOOD THINGS SMALL BOXES

Monday, March 12, 2018

HOLIDAYS CRAFT BLOG CATCH UP!

CRAFT CATCH UP!   
I don't know why I don't craft and blog, craft and blog. I do one or the other and forget the other part. It's not a good way to build followers.  I thought I would catch you up with my crafting endeavors.  

I started looking through my camera roll for my St, Patty's Day gnome, and realized how much I did not share.  I have updated the Peanuts, Welcome Great Pumpkin display with pictures.

For Thanksgiving I did several items.  From Craft Klatch on YouTube, I decided to make a centerpiece of pumpkins and a sign.
Craft Klatch with Mona is a great channel. Mona crafts different things, but a majority of things I have viewed have been made with resin.  In fact, it is from her channel that I learned about resin and how to use it.  This craft project is not resin, but it caught my eye.

Mona used styro pumpkins she got at a Dollar Store and painted and fixed them up in her usual flare!  I used two deli fruit bowls that I had on hand. I painted them to look like pumpkins, added wire tendrils and sat them in real leaves and curled orange ribbon on a painted white tray.  This way the flat, open bowls did not give the half pumpkin away. I did do Mona's  "Happy Thanksgiving" sign as she did in her tutorial.  The result:


I added paper leaves cut from my Silhouette Portrait.  I made the signs from glued popsicle sticks.  It was an amazing hit!

Mona also inspired me to design a pillow cover/sign on burlap that sends the message of Thanksgiving: "Be Grateful.  I drew the letters by hand. Now, I'm thinking maybe I should crewel stitch them!
                     

I recommend you visit Mona's channel. She is a wonderful, adventurous crafter and her tutorials are very detailed. She shares what she has learned and improves on her methods.  She is a very warm person and I feel like I am right in her crafting corner with her. I love her motto "Life is too short not to shimmer so grab your glue and your glitter."  If my floor isn't showing flecks and shines of glitter, I'm not crafting enough!  Love that glitter!  You can find #CraftKlatch on YouTube Craft Klatch

Every Thanksgiving, I see the figures of polyresin pilgrims and native Americans representing the first Thanksgiving.  I have always wanted a set, but seems the budget gets short close to Thanksgiving and Christmas.  Why is that? !!!
So last Thanksgiving, I decided to give it a try.  I ordered a facial push mold and made the faces.  Then, taking wire, I fashioned the body shapes of a man and woman pilgrim. I dressed them with scraps of material and felt, gluing them on the figures. I sew, but this seemed the most efficient way to fashion their clothes. For hair, I found a fluff of black felting.  I played with giving him a beard. I used strawberry orange yarn for the lady's hair.  I made the native American faces.  I need to finish the bodies in the next eight months.  Plenty of time, right??!!!   lol  Here are the pilgrims as I packed them away for next Thanksgiving.


I'm quite pleased with my first endeavor to make figures! I'm open to any suggestions as to form, process or ways to form the bodies.


POLYMER TURKEY PIN

For Thanksgiving, I also fashioned this turkey pin to wear.  Rather crude, but he was loved by all.

I also wanted and had to have a straw turkey centerpiece as was so popular last year.  So I took my raffi and tamale wraps and wire and made this little guy.
I used polymer clay to make the head.  My turkey's seem to have goofy faces!!  I think, when he comes back out next season, I'll run some burgandy lines on those white feathers to pull it all together.  I took a Christmas pick with glittered berries to make the clawed feet.  What do you think?  Let me know int he comments below + or -?

I received glass paints for review and decided to paint a Dollar Tree vase with fall leaves.  Where did all this time come from???  I truly don't recall. lol  Here is the fall leaf vase:

It took a few layers of paint to get the fallish colors.

WHICH BRINGS ME TO CHRISTMAS. Well, I am sure you know that the holiday season has so very much to do as it is without adding crafting, but somehow, I fit a bit of it in. I like to make gifts as well as decorations and some are both!


This is a paper wreathe made from a purchased design and cut out on my Silhouette Portrait. 

 I also made an advent wreath cutting pine sprigs from paper and taping them to a wire wreathe ring. I did not take pictures!! So when I pull it back out, I'll have to share that with you.  The wreathe itself lies flat but it has burgandy ribbons attached to a small pole up the middle of the wreathe. The pole has a pinch clothespin at the top that holds the looped ribbons that drape from the wire wreathe.  It is topped with a handmade gold glitter start.


 I spent time redoing a small room tree.  I love Shabby Chic and had little pink roses that I added to a simple little tree. I did the same with a tired wreathe I  have had for several years. I added pink tiny roses to that as well and hung it in my room.


SHABBY CHIC ROOM TREE 

SHABBY CHIC CHRISTMAS WREATHE


PILL CONTAINER ADVENT WREATH

The pill container advent wreath was a real challenge.  I had kept the containers for years with this idea in my head.  The trick I think is to make the pill containers NOT look like pill containers so that children don't get any confusion in the future.  The above picture still isn't the finished product.  I will do that soon as I heard there is a contest out there for pill container use. The idea is to fill the containers with candy, erasers, charms, little things that a child of eight years old would enjoy finding inside and playing with until Christmas.  I will post an update with the details and finished product very soon.

The pill lids would also have a little charm, button or decoration glued to the inside. When it is opened, the pill lid is flipped over and replaced on the bottle showing a little tree decoration.  Clever?  what do you think?  I also toyed with the thought of using a longer pill container as number one and inside of that, the Elf on the Shelf! as a way to introduce the little guy!  However, doing that through off the balance of the tree and brought on a fail in my first attempt. 
Here is the fail:
FAILED PILL CONTAINER TREE YOU SHOULD HAVE SEEN IT FROM THE SIDE!
 The key was to use containers of all the same size so that there is balance and symmetry. I knew that, I just got carried away with the idea.  Does that ever happen to you?!


WOVEN NATIVITY WITH ADDED LED LIGHTS

My sister sent me this woven picture of the nativity that she found at Walmart.  It is lovely in itself. I decided to add a set of led lights to punctuate the stars in the sky.  I also added one tea light for the brightest star. It's hard to tell which one that is in this picture.  I am looking for a frame so that I can hang this up next Christmas. 

Okaaaaaaay I think I have brought my blogging up to date on crafts for the past holidays.  I am currently working on Easter and will share those soon!  

Thanks for visiting, reading and commenting.
 ~~Marie